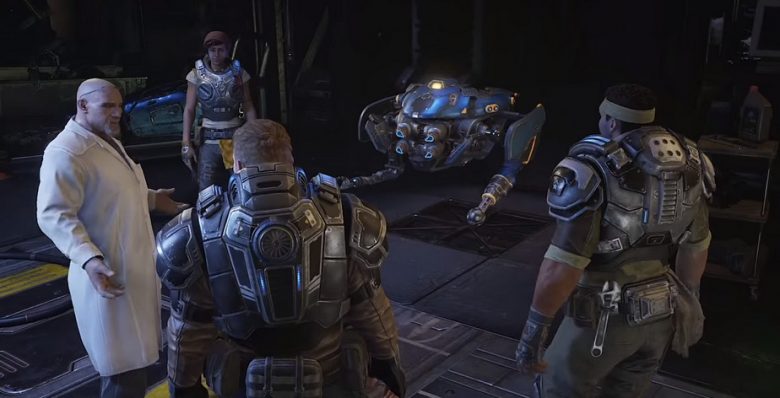
It won’t take long for you to polish off the Gears 5 tutorial and get yourself knees deep in the campaign, As soon as you start ploughing through the story, there’s a point where you will need to begin collecting Gears 5 components. The Gears 5 components are also referred to as Jack upgrades, and you’ll soon discover Jack as being a trusty companion who will stay by your side through the entire campaign. In order to upgrade Jacks abilities and turn the drone into a death machine, you’re going to need to collect the components located throughout the campaign. Use and abuse our Gears 5 components guide as your own leisure, and we’ll be adding to this guide as we discover more of the component locations.
We’ve built our Gears 5 components guide as simple as we possibly can, and have kept the details free of spoilers where possible. Keep an eye towards the top left portion of the screen as the current objective will assist you in knowing when and where to start your components search. To help keep your search to logical order, we’ve kept the list of components to in sequence so that you can find them while still progressing, rather than having to revert back.
Before we continue with our Gears 5 components guide, it’s worth noting that Act I: Chapter 1 does not contain any Gears 5 components, so you can keep going until you reach chapter 2.
#1 – Inside the armoury, lying on the table.
#2 – Inside the armoury, head around the back to find a locker with “Reed” on it. It’s inside the locker.
Gears 5 components guide: Act 1 – This is War components
#3 – After fending off the Juvies, head from “The New Emphyran: 20th Anniversary Edition” to the other side of the room, through the door threshold. It’s close to the wall. If you duck through the broken wall, you’ve gone too far.
#4 – Head upstairs after defeating the first wave of normal Swarm. It’s in the middle of the copy room.
#5 – Heading downstairs after the friendly COG shoots at you, take a detour to the right of the staircase and investigate the wall nearby for 3 component points.
#6 – After being asked if you came to rescue the civilians, head into the small room straight ahead and look to the right.
#7 – After the mid-mission checkpoint, instead of heading left into the wreckage, head right to the broken bridge. Use Jack to bring over the component.
#8 – When you’ve fended off the Juvies in the town, look for a shop named “All that Juice”. Head inside and all the way around to the openable container.
Gears 5 components guide: Act 1 – The Tide Turns components
#9 – From the beginning of the level, head inside the coffee shop and around the back into the kitchen to pick this component up.
#10 – After picking up the Stim, run through the fire with the ability enabled. Head onward until you can see a shop on fire called “Blooming Wilds”. Use the Stim to run through the fire and pick up the component inside.
#11 – Head into the delivery point by the Hotel and before opening the double doors, circle around and lift up the garage door. On the vehicle parked next to it is a component.
#12 – Heading into the theatre, turn left towards going into the dressing room, then turn right to the storage facility with the top hat. Use Jack to fish out the component.
Gears 5 components guide: Act 2 – Recruitment Drive components
- Component – From start, head downstairs and turn left into Produce shop. It’s by the apples.
- On the right side of the main street, follow the boy who shoots with the wooden lancer. Turn right again and head downstairs into the room with ice blocks to find the component.
- After the checkpoint gate, you’ll see a building to the right of where the steam vent fails. Inside is a component on a shelf.
- Inside Salvage N’ Trade, there’s a component on the desk.
- Head downstairs after passing through the workshop to find a component on the floor in the room on the left.
- After the vision, head into the control room on your left and look for the component on the shelf.
- Heading down the stairs towards the steam farm, where people are planting things. Head around the back of the red building to find a component on the floor.
- In the garage after the cutscene towards the end of the chapter, head to the right-side of the garage and open the yellow hatch.
- In the garage, climb the ladder on the left to find three more component parts on a console.
Gears 5 components guide: Act 2 – Into the Wild components
- Inside the train tunnel, after defeating the Carrier, open the train car to find a component.
- Towards the gate to the east of the first gate, look at the wrecked vehicle closest to the gate. On the right-hand side, there is a buried component.
- At the camp on the way to New Hope, there is a component there.
Gears 5 components guide: Act 2 – Forest for the Trees components
- Once you’ve defeated the Warden on the bridge, cross it and enter the tomb on the right. Head downstairs and use Jack to open the safe containing the three components.
- After dropping into the prison cell, head out into the hallway and look for a room emitting gas. Put on the Stim perk and run through to grab the three components.
- Jack into the door to the right of the hallway to find three component parts.
Gears 5 components guide: Act 2 – The Source of it All components
-
- After defeating the Scion and snipers at the gate, head into the control room and open the hatch for three components.
- Before the first communications tower in the east, take a detour around the left side and up the hill. Cross the ice bridge and head for the fuel tank. It’s on the western side of it.
- Just before getting to the communications tower in the east, check the orange building to the left of the path. Inside you’ll find a component hidden between a console and an inactive generator.
- Once inside the eastern communication’s tower, after dealing with the razor hail and boulders, head downstairs and look back at them to see the component.
- After hacking into the computer, enter the door on your right. You’ll need Jack to grab the component off the top of the shelf to your right.
- Just before reaching the first set of turrets in the easter comms tower, circle back to the left of the bottom of the stairs to find a yellow hatch to find a whopping five component parts.
- In the Abandoned Mines area, as you descend down the first slopes, you’ll drop to an area with some yellow trailers. The one blocking the tunnel contains a component part. Don’t descend down the red girders as you won’t be able to get back up.
- Upon opening the metal door inside the mine after going up the lift, check the room on the right and have Jack open the safe. It’ll contain five component parts.
- When you enter the room in the mines with the pods, look to the left and head inside the shack with paper lanterns. Once inside, turn around to find a yellow hatch on the wall with three component parts.
- At the Condor site, once you’ve fought off the Rejects and two leech swarms, head into the wreckage and turn left. There are three component parts on the right.
- At the northern Condor crash site, as you walk through the gap in the wall, head forward while looking to the right side. Three component parts are by the opened pods.
- Before you run out of the northern Condor site, keep an eye on your left to find a single component part. It’s easy to miss if you’re sprinting.
- In the central Old Derrick Site, head to the main courtyard and pan to the left. There’s some ice blocking a small clearing. Get rid of it and look to the right for three component parts.
- Just outside of the western Old Derrick Site, there is a skeleton left of the entrance. Look behind him for three component parts.
- In the substation near the northern communication’s tower, there is a single component part located near the console on the left as you walk in.
- As you walk to the northern communications tower, you’ll find an abandoned Condor. Crack open the safe in the wreckage for three component parts.
- As you approach the northern communications tower, you’ll see some Rejects. Clear them out and crack open the safe on the right drawbridge for three component parts.
- Inside the communications tower, turn left before descending the stairs to find a small room. There is a hatch with a single component inside.
Gears 5 components guide: Act 2 – Dirtier Little Secrets components
- When you come across the main gate, there’s a room guarded by two turrets to the left. This houses a generator you need to unlock, but also a hatch that has five component parts inside.
- Once inside the laboratory, head upstairs to the left and into the control room. There’s a component on a table in front of you as you enter.
- After disabling the cryo-jets, head down past the frozen COG soldiers, then up the ramp to the kickable door. Inside there is a hatch with five component parts.
- Continue the tour until you get to a room with more frozen statues and some unstable experiments. Up the ramp, there is a component part to the right on a table.
- After disabling the second cryo-jet, found after the cutscene, head back into the freezing room to find the three components.
- After smashing through the ice pillar, there is a freezing room ahead. Towards the back, there is a component part on a shelf.
Gears 5 components guide: Act 3 – Fighting Chance components
- From the beginning of the chapter, enter the small office on the left to find one component.
- Head downstairs from the beginning of the level. You’ll see arrivals and departures on your right. Keep walking straight until you see a door to your right. Enter and immediately turn left, before sending Jack to pick up three component parts.
- Pass through the arrivals gate and follow the path around until you reach the room ahead. Turn left immediately and open the hatch for three more component parts.
- Beside Baird’s makeshift lab, there is a small pile of scrap to the right. A component is lying there.
- Once you’ve picked up the Hijack upgrade, follow Baird to the training grounds. The three components are a little further on to the right, half-submerged in the sand.
- Behind the tent where you speak to Paduk, there is a hackable safe that contains five component parts.
- On the far left side of Hangar 1 inside of the main base, there is a hatch containing three component parts.
- When you get to head out on the Skivv, hang a right and head to Hangar 3. On the right side of it is a hatch that has five component parts inside.
Gears 5 components guide: Act 3 – Rocket Plan components
- From the beginning of the chapter, head down and back up the other side of the stairs. Turn right to find a component hidden amongst some green containers.
- After entering the main hangar, head right downstairs one floor. Turn right and wrap around the orange pipe and you should see some lockers and a sign in foreign text. A hatch with three components is on the left of that.
- Once Fahz has ferried you across the hangar, take a left and follow the path to the end. It is a little hard to see, but there is a hatch at the wall on the end, containing three components.
- You’ll eventually come across a door with the number 2 on it. Instead of going in, vault over the hump on the hill to the right, then follow the path around to find three components on some containers.
- When you get to the lift after defeating the carrier, turn right and head to the second lift. There is a hatch there with three components.
- At the Train Turntable, once you’ve defeated the Warden, head into the control room to find a hatch with three components inside.
Gears 5 components guide: Act 3 – Some Assembly Required components
- After clearing out the water tower, head around the back of the main building to find a hatch for three more components.
- Head up the walkway after clearing the water tower. Use Jack to collect the component on the other side of the broken part of the walkway.
- After fixing the pump station, look to the crates to the right of the thing that Jack used to repair the pump to find a single component part.
- As you’re exiting the ruins west of the Harbour Docks, past the exploded room with the flag on the back wall, there is a set of double doorways. Turn left as soon as you go through them to find three component parts.
- At the Harbour Docks, there is a submerged boat. At the back of the boat, where the engines are, there is a single component pice on the surface. These are not the fully submerged ones towards the big structure itself.
- As you enter the Cosmonaut Training Facility, take a detour by the tank to the left of the main path. Follow this around to find a single component buried near some scrap metal.
- Enter the hole in the Cosmonaut Training Facility main building and turn left. You should see a hatch with three component parts inside.
- As you enter the Cosmonaut Training Facility sub-level, head down the slope, then turn left when you reach a big room. You should eventually see a small doorway. Inside is are three component parts next to a bunch of skeletons. This is before using the terminal.
- After you crack open the Cosmonaut Facility with Jack, the big doors will open. Run through and hang a right, before vaulting the ledge. There is a small room on the right with a safe, containing five component parts.
- When you defeat the first Swarm enemies inside the Cosmonaut Facility, kick down the door upstairs. Turn right and walk to the end of the room. A hatch containing three component parts is on your left.
- When you make a pipe descend to make a bridge, cross it and follow the path until you drop down. Turn right and break the lock. Inside this room is a hatch with five components.
- After picking up the Beacon, follow the path and hang a right into an audience chamber. In a side room on the other side of this room is a single component part on a container.
- From the previous component, there’s a door behind you and to the left. Inside is a hatch containing five component parts for you to collect.
- Outside the Abandoned Airfield, where the flags are, there is a single component part near the sandbags to the right.
- Back at the Abandoned Airfield, Baird will have a new upgrade for you. To the left of his desk is a component part.
- Over by the ambushed convoy and the Beacon parts at the back of the location are three component parts.
- After taking out the enemies at the Artillery base and freeing the nomads, head upstairs and look in the hatch to the right. There are three component parts to be found.
- South-east of the sandstorm there is a crashed condor site. Killing the DeeBees and venturing into the wreckage will reward you with five components, provided you get them out of the safe with Jack.
- Not far from the crashed condor site, there is a bit of wreckage to the west. Inside is a component sitting on a container. Two DeeBees will ambush you when you take it.
- Outside of the Cargo Ship to the east of the Artillery Battery, clear out the enemies inside, then head towards the entrance to the container. Before going up the stairs, take the three component parts on the ground.
Gears 5 components guide: Act 4 – Homefront
This is the final chapter where you can find Gears 5 collectables and thankfully there is only a handful of them. There are also a total of 15 components in the entirety of Act 4, so also more manageable than the previous act. You’re almost there, so look to the tips below for the whereabouts of the final few collectables.


