The Division 2 has been out for a week now and has proven to be a phenomenal game. One of the best parts of the game is that it is challenging; in the first Division, you could easily run past enemies that were far weaker than you and rely on armour to keep you safe until you were out of range. In The Division 2 weaker enemies might be easy to kill, but they hit hard and quickly flank, especially at higher levels. I am here to give you the best tips for surviving in this post apocalyptic version of DC.
First, we should understand what type of game The Division 2 is. Just like most loot n shoots, the real game starts when you finish the story. The Division 2 getting started guide is designed to get you to end-game in an efficient way.
The Division 2 Getting Started – Play all the Main Missions. Until you cannot.
It is against my gaming style to power through all of the main missions without completing every side mission and collectibles… but do it. Main missions in story mode have a set level that increases by 2 every mission. Side missions scale with your character so that in later levels they will give more XP. Grind out the main missions until you cannot. When things get too difficult, and you are under recommended level, then utilise the side missions to help level up. If you complete all of the side missions first, you might find yourself under level without any large XP activities to make up the difference.
PERKS!

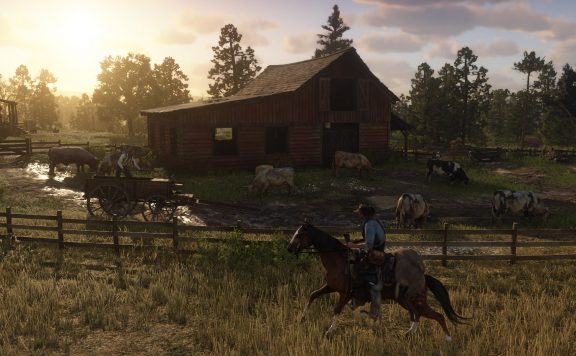
XP Accolades help with early levels
Perks are an important part of early game in The Division 2. They give your character inventory slots and mods that make early game a little easier. The first perk you get is forced on you and gives you a secondary weapon slot. Once you start accumulating a stockpile of SHD Tech points, you may be wondering what exactly to spec into. One of the best perks early game is the XP bonus accolades. These perks give bonus XP for things like headshots and multi-kills which happen all the time. After accolades, it is very useful to pick up some extra armour and grenade spots, as these are used quite often.
The Division 2 Getting Started – Clear Checkpoints for Gear

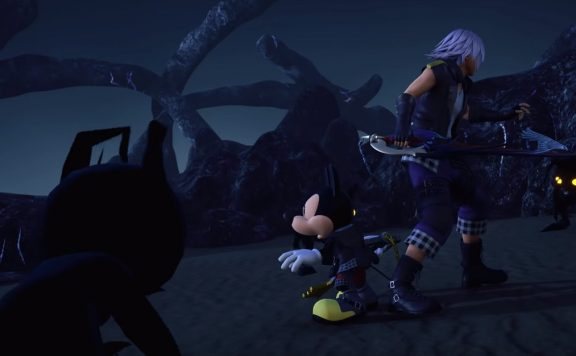
Supply room great for early game easy loot
There is so much loot in The Division 2. Overwhelming at times, but at the low levels I often found myself with under-leveled gear. The game will actually warn you that a piece of you gear is not up to spec, encouraging you to look for something better. Head for a checkpoint. Checkpoints are controlled by different factions. In early game you will want to start clearing them out because they serve as vital fast travel and re-spawn points. As a bonus, when you first complete the checkpoint, there is a room that opens up called a supply room which contains a large loot chest surrounded by smaller loot chests.
The Division 2 Getting Started – Game Play tips

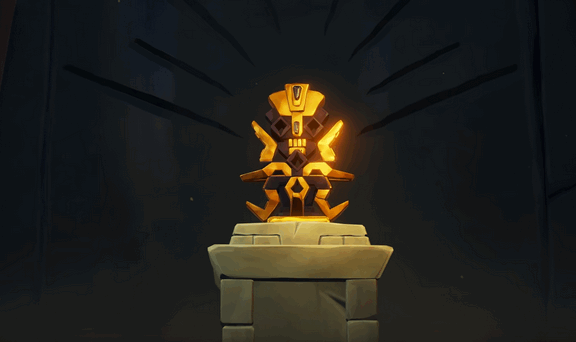
z or up on d pad to mark targets
You can Mark Targets: If you are playing with tactical players and not trigger happy rouges you will appreciate the ability to mark targets was carried over from The Division 1. Click ‘z’ or up on the d-pad while focusing on a target to mark it for your squad. This will allow your entire group to see a small triangle above each marked target without focusing them. This can be useful because when a group of 3 enemies is actually a group of 8 hiding in a building, if you do not take the time to mark your targets, you will be flanked quickly.
Sprint while aiming to swap shoulders: The entire game is third person looking over your characters right shoulder. Sometimes this can make for some weird angles that are difficult to aim around. While aiming, you can change the shoulder your camera is looking over by clicking Sprint (Shift or L3). This is very useful when you are trying to shoot down stairs or over a balcony.
The Division 2 Getting Started – Gear level is not all that matters. Check your Talents
When first playing I assumed that all gear before level 30 is throw away, and it is, but do not dismantle gear simply because it has a lower gear score. Look at the talents and weapon talents. I carried one weapon and mask for 4 levels beyond its gear level because it was such a good talent match. The rifle gave +20% damage to blinded enemies which does not happen that much but the mask gave 15% chance to blind target on headshot and it was a great combo until I found significantly better equipment. Always check your talents to see what benefits they give and make sure to pick ones that match your play style.
The Division 2 Getting Started – While playing with higher level players. Do not get hit.
It is common practice to pull in higher-level players to power level the newbies. The Division 2 did a great job of scaling the gameplay to be exciting for lower-levels while still challenging to higher-levels. They did this by scaling everything to the higher-level character, except health. If you are level 10 and you play with a level 20, all enemies will be level 20. Your damage will scale to allow the lower-level to actually participate but the lower-levels health does not scale as much. So, getting hit basically means insta-death. Anything above 3-4 levels can almost one shot you, if you want to challenge yourself try playing with higher-level characters.
TLDR
Prioritise all main missions first. Use side missions to level up in between.
Get headshot and multi-kill accolade perks then armour and grenade spots.
Mark targets with z or up on the d-pad.
Swap shoulder while aiming with Sprint (L3 or Shift)
When you need gear at low levels do control points.
Gear level is not all that matters. Check your talents.
When playing with higher level players you damage scales but you health does not.
Need more help following The Division 2 getting started guide? Check out or how-to’s and much more in our Guides and Wikis section.